7 Ways to Reduce Production Picking Errors

Last Updated: November 7, 2026
Quick Summary
To reduce picking errors, first log every mis-pick against a small error taxonomy and measure order, line, and unit accuracy for two to four weeks before changing anything. Then fix bin and product labeling, slot fast movers near the picking face, and add scan-based validation that blocks a pick when the bin or part code does not match the pick list.
- Keep the error taxonomy small, with four to six buckets such as wrong item, wrong quantity, and missed pick.
- Measure for at least two to four weeks before you touch a label, a slot, or a scanner rule.
- Scan the bin location before the part and block the pick if either scan fails.
- Test new slotting on one production line for a week and compare error rate and walk time.
- Log every blocked scan as an error, even if the picker fixes it.
Table of Contents
- Start With the Causes of Warehouse Picking Errors
- Measure Warehouse Picking Accuracy Before You Fix It
- Step 1: Fix Product Labeling and Bin Identification
- Step 2: Use Warehouse Layout for Picking Efficiency
- Step 3: Add Barcode Scanning and Scan-Based Validation
- Step 4: Standardize Picking With Work Instructions and Training
- Step 5: Close the Gap Between Picking and Packing Errors
- Step 6: Handle Exceptions and Recover After a Mis-Pick
- Frequently Asked Questions
Start With the Causes of Warehouse Picking Errors
Most teams attack picking errors with a clipboard and a warning. That rarely works.
Production picking carries extra risk. A picker grabs a part for a build, not a retail order.
The errors look random until you sort them. Then they cluster.
A picker grabs the wrong item for a few common reasons:
- Two products look alike and sit close together
- A bin label is faded, missing, or wrong
- The pick list lists a code the picker cannot match to a shelf
Notice what is missing from that list: laziness. Almost every mis-pick traces back to a system that allowed the mistake.
Build a Simple Error Taxonomy
An error taxonomy is a fixed set of categories you sort every mis-pick into. It turns a vague complaint into a pattern you can act on.
Keep it small. Four to six buckets work best:
- Wrong item: the right location, the wrong SKU
- Wrong quantity: the right item, the wrong count
- Wrong location: the picker went to the wrong bin
Log every error against one bucket. After a month, the biggest bucket tells you where to start. Our root cause analysis deep dive walks through 5 Whys, fishbone, and 8D with worked examples.
Measure Warehouse Picking Accuracy Before You Fix It
You cannot improve warehouse picking accuracy without a baseline, and a baseline needs more than one number.
Start with three accuracy measures, because they answer different questions:
- Order accuracy: the share of orders or work orders that ship complete and correct. Formula: (total orders - orders with any error) ÷ total orders × 100. This is the number your customer or production line feels.
- Line accuracy: the share of pick lines that are correct. Formula: (total pick lines - error lines) ÷ total pick lines × 100. A line is one SKU on one order. This is the number that shows whether pickers are getting individual picks right.
- Unit accuracy: the share of individual units that are correct. Formula: (total units picked - error units) ÷ total units picked × 100. This matters most when a wrong count on a high-quantity line can scrap a build.
Track error rate alongside them: errors per thousand picks or lines. Rate is easier to compare across shifts, pickers, and zones than a raw count.
Order accuracy often looks strong while line accuracy is weaker, because most orders are small and a single error is diluted across many correct lines.
Set a Baseline Before You Change Anything
Measure for at least two to four weeks before you touch a label, a slot, or a scanner rule. If you fix first and measure later, you will never know what worked. Pick a fixed window, log every error against your taxonomy, and calculate the three accuracy figures for the same window each month.
Set up a simple log with these fields:
- Date, shift, and picker or zone
- Error category from your taxonomy
- The SKU, bin, and work order involved
That last field matters. A blocked scan is a near-miss, and near-misses show you where the system is weak before a real error reaches the line.
Interpret the Trend, Not the Single Number
A single month's accuracy figure is noise. What you want is direction and location.
- Is the error rate rising, falling, or flat over three months?
- Which taxonomy bucket is growing, and in which zone or shift?
- Where are errors being caught, and is that point moving earlier?
A mis-pick caught at the packing bench is cheaper than one caught by the customer or the production line.
Watch out: do not compare accuracy across sites or teams without normalizing for order mix and volume.
For a deeper method on tracing the causes behind a rising bucket, our root cause analysis deep dive walks through 5 Whys, fishbone, and 8D with worked examples.
Step 1: Fix Product Labeling and Bin Identification
Clear labeling prevents more picking errors than any training program. It is also the cheapest fix on this list.
Start with the shelf, not the product. A picker reads the bin location first. If that label is wrong, the best-trained picker still fails.
Work through these fixes in order:
- Put a bin location label on every shelf edge, at eye level, in large print
- Add a second label on the shelf below, so pickers can read from a distance
- Mark the bin location on the pick list in the same order it appears on the shelf
Then look at the product itself. Similar-looking SKUs cause a large share of wrong item mis-picks. Separate them physically.
Mistake-proofing goes further than labels. Our poka-yoke guide covers the definition and the common devices. Our poka-yoke guide covers the definition and the common devices.
Step 2: Use Warehouse Layout for Picking Efficiency
A good warehouse layout for picking efficiency cuts both errors and walk time. The two are linked: tired pickers make mistakes, and long walks make tired pickers.
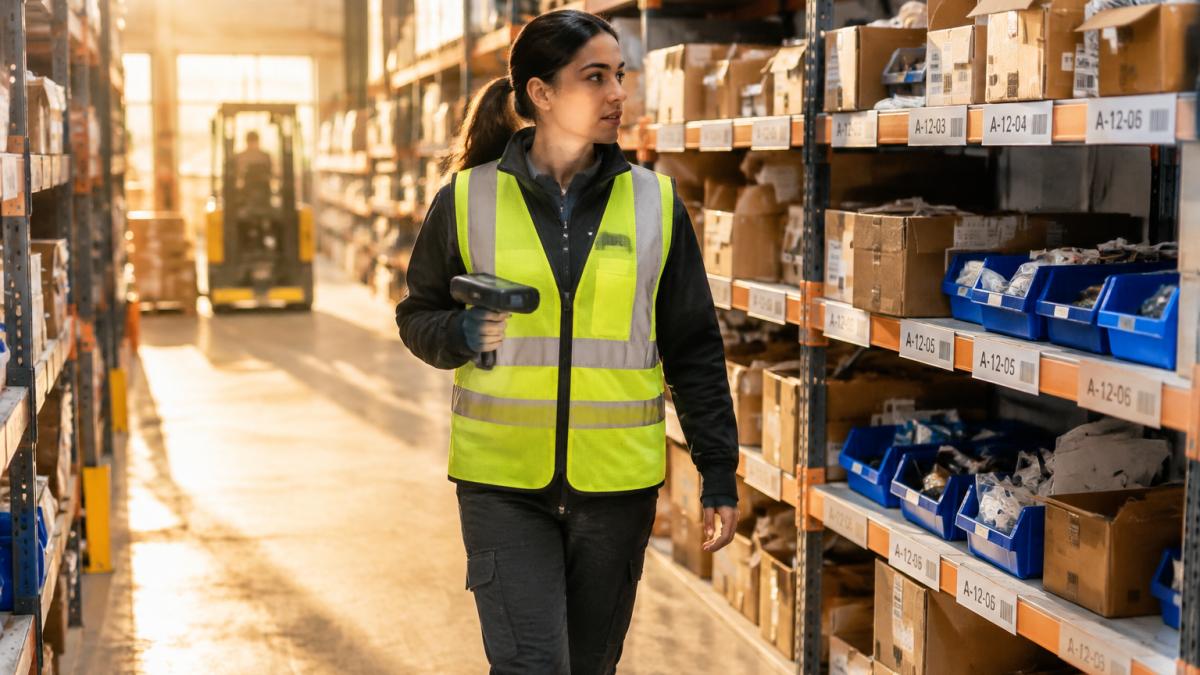
Start with inventory slotting. Fast-moving parts belong near the picking face; slow movers can sit further back.
Next, group by family, but separate look-alikes.
Then check the route. A picker should not cross the same aisle twice for one order.
Adapt the Layout to Production Picking
Production picking has three flows that a retail warehouse does not: kitting, line-side replenishment, and work-order picking. Each has its own layout logic.
- Kitting: components for one build are gathered into a kit before assembly. Kit areas should sit close to the components they draw from, with a clear staging lane so a completed kit does not block the next picker.
- Line-side replenishment: parts are restocked to the line at a fixed trigger point. The replenishment route should be short and one-way where possible, and the line-side bins should be labeled to the same standard as the main store so a picker can match them without translation.
- Work-order picking: a picker pulls components against a specific work order. The pick list should follow the physical route, and the staging area should separate work orders so components from one build cannot drift into another.
Traceability belongs in the layout too. If a component must be traced to a build, the pick and staging points should make it easy to record the lot or serial at the moment of pick.
Test Before You Move the Floor
Watch out: a layout that helps one shift can hurt another. If your picking faces serve two production lines, test the new slotting on one line first.
A layout change is also a labeling change. Every bin that moves needs a new label, and every old label needs to be removed or blocked so a retired location cannot be picked.
Step 3: Add Barcode Scanning and Scan-Based Validation
Barcode scanning turns a pick into a check. The picker scans the bin, then the part.
This is scan-based validation, the single most effective control for wrong-item errors. It catches the mistake at the shelf, not at the packing bench.
Set the rules clearly:
- Scan the bin location before the part
- Scan the part before it goes in the tote
- Block the pick if either scan fails
Scanning only works if labels are clean and readable. Fix Step 1 first. A scanner that cannot read a label becomes a picker who overrides it.
Step 4: Standardize Picking With Work Instructions and Training
Standardized picking means one documented best method for each task. Not a suggestion. A fixed sequence every picker follows.
Write the work instruction for each picking zone. Include:
- The exact sequence: scan bin, pick part, count, scan part, place in tote
- The count method for loose parts
- What to do when a scan fails
- Where to stage the tote
Our guide to standard work in lean manufacturing explains takt time, work sequence, and standard WIP with a worked example. For training, TWI Job Instruction breaks a job into steps, key points, and reasons, the fastest way to get a new picker to standard.
Training alone does not fix a bad process. If a picker follows the standard and still mis-picks, fix the standard, not the picker.
Step 5: Close the Gap Between Picking and Packing Errors
Picking and packing errors are often the same error caught at different points. A wrong part picked at the shelf becomes a wrong part packed at the bench.
The gap between them is your recovery window. Close it with a second check:
- Verify the part against the pick list at the packing bench
- Weigh or count the tote if the part count is fixed
- Flag any tote with a blocked scan during picking
- Send flagged totes to a separate check before packing
Track where each error is caught. If most errors surface at packing, your picking controls are weak.
The goal is to catch errors earlier, not to catch more of them. A mis-pick caught at the shelf costs a few seconds.
Step 6: Handle Exceptions and Recover After a Mis-Pick
Every warehouse needs an exception process. When a mis-pick reaches the line, speed of recovery matters more than blame.
Write a short, fixed routine:
- Stop the affected build or order
- Identify the wrong part and the correct one
- Check whether the same error hit other totes from that picker or bin
- Replace the part and restart
- Log the error against its taxonomy bucket
Step 3 is the one teams skip.
Then feed it back.
Picking errors rarely come from one weak link. They come from labels, layout, scanning, and training that were never checked against each other.
When a mis-pick reaches the line, follow this fixed recovery routine.
| Step | Action |
|---|---|
| 1 | Stop the affected build or order |
| 2 | Identify the wrong part and the correct one |
| 3 | Check whether the same error hit other totes |
| 4 | Replace the part and restart |
| 5 | Log the error against its taxonomy bucket |
Frequently Asked Questions
What are the most common causes of picking errors in production?
Most picking errors trace back to a small set of causes: similar-looking products stored next to each other, unclear or missing bin labels, pickers reading a paper pick list under time pressure, wrong quantities counted by hand, and stock that sits in the wrong location after a rushed put-away. Fatigue and shift patterns make all of these worse. Before changing anything, log every error for two to four weeks by type and location. That log tells you which cause dominates in your facility, so you fix the real problem rather than guessing.
How should picking accuracy be measured?
Track picking accuracy as correct picks divided by total picks, then multiply by 100. Count a pick as correct only when the item, quantity and location all match the order. Measure at the pick stage separately from the pack stage so you know where the error started. Review the figure weekly and split it by picker, shift and zone. A single site-wide number hides the zones and shifts that are actually dragging accuracy down, and it gives you no baseline to prove a fix worked.
Can warehouse layout really reduce picking mistakes?
Yes, layout is one of the highest-leverage fixes. Slot fast-moving SKUs in the golden zone between waist and shoulder height, separate similar-looking products by at least one bay, and keep fixed locations so pickers learn the map. A clear layout for picking efficiency shortens travel, reduces reach and stretch, and cuts the number of decisions a picker makes per line. Fewer decisions under time pressure means fewer wrong-item and wrong-quantity picks.
What technology helps reduce order-picking errors?
Scan-based validation is the most direct technology fix: the picker scans the bin location and the item barcode, and the system blocks a wrong pick before it leaves the aisle. A warehouse management system adds directed picking, real-time inventory accuracy and an audit trail per transaction.
